How to set up and operate switch control with an Android device
This article explains how to set up and operate switch control with an Android device. For instructions on using switch control with an iOS device, see here.
Introduction
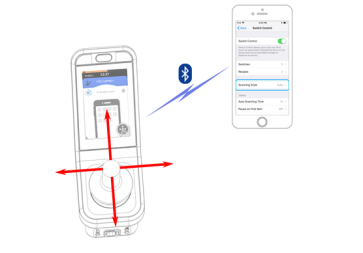
Switch control is an accessibility feature that allows the user to navigate and select items on their Android or iOS device using primary inputs, control inputs, or the REM400/500's touch screen.
.
To use switch control, you will need to pair your LiNX system to your Android device and link a connectivity card to the paired device. Before operating, you will also need to identify the switches (inputs) you will be using and then assign an action to each switch. This article shows you:
-
how to set up a connectivity card:
-
how to connect to a device
-
how to configure switch control
-
how to operate switch control
-
how to disconnect a device
-
how to forget a device
| NOTE | The following instructions assume that a connectivity card is available and selectable in one or more profiles. It also assumes that the user's Android device, to which the LiNX system connects, has an active Bluetooth connection. |
| NOTE | Android-specific instructions, below, are illustrative only as the steps may differ slightly between different Android versions. |
Set up a connectivity card
Before you can use a connectivity card, you will need to:
These actions are described in more detail below.
Pair the LiNX system with the user's device
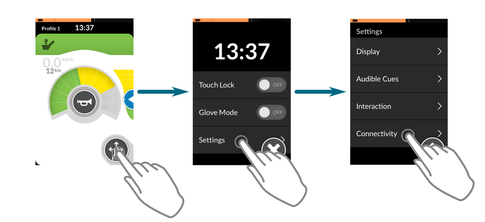
Open the connectivity settings menu by tapping and holding the Navigation button until the status and settings screen is displayed, and then tap on Settings | Connectivity.
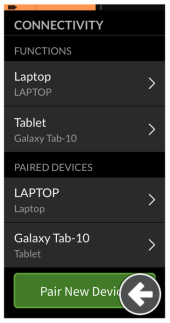
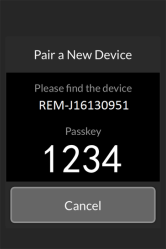
At the bottom of the connectivity settings menu, tap on the Pair New Device button.
The pairing passkey displays on the touch screen with the name of your LiNX device to pair with — for example: REM-J16130951.
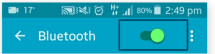
On your Android device, open the Bluetooth menu by going to, for example:
Settings | Bluetooth
If Bluetooth is not switched on, then switch it on now.
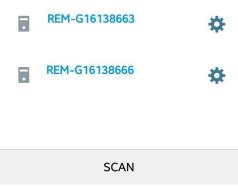
After a short time, a list of Bluetooth devices is displayed on your Android device. Locate and tap on the name of the LiNX device that you wish to pair with (e.g. REM-J16130951) — the Bluetooth status of the selected LiNX device changes to "Connecting" while attempting to pair.
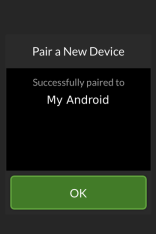
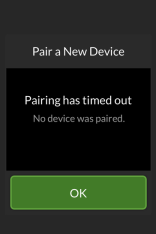
If the device pairs successfully, a confirmation screen is displayed on the remote module. Tap on the OK button to proceed. If no device is paired within the set timeout period, a message is displayed "No device was paired". Tap on the OK button to proceed and retry pairing.
| NOTE | The LiNX system remembers up to 10 paired devices. If you have reached this limit, and you need to add more devices, consider "forgetting" devices that have already been paired. |
Link the connectivity card with the user's device
Connectivity cards must be linked to a paired device. To link a connectivity card to a device, open the connectivity settings menu by tapping and holding the Navigation button until the status and settings screen is displayed, and then tap on Settings | Connectivity.
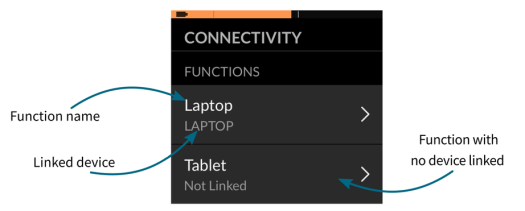
The names of the connectivity cards are displayed in the Functions section (top section of the connectivity settings menu).
For each menu item, the connectivity card's name is displayed at the top, and the user's device, if any, is displayed at the bottom. If the connectivity card has no device linked to it, then "Not Linked" is displayed.
For connectivity cards that have not been linked, tap on the appropriate menu item.
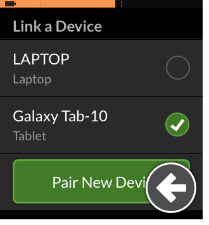
Tap on the Not Linked button and select one of the paired devices in the list, or tap on Pair New Device button to pair with a new device.
Connect to a device
To connect to a device, select the appropriate connectivity function from a profile.

If the connectivity function is paired to a device, and the device is linked to the function, then it attempts to connect to the device via Bluetooth.
The Bluetooth connection status indicator shows when the Bluetooth connection between the LiNX system and the user's device is:
|
disconnected |

|
|
connecting |

|
|
connected |

|
|
no device |

|
If the Bluetooth fails to connect, the status reverts to disconnected. To attempt to connect again, reselect the connectivity function from the profile (that is: deselect it, and then reselect it).
Configure switch control
Before you can use switch control, you need to identify the switches you will be using and then assign an action to each switch. For example, if you want your device to return to its Home screen when you tap on the REM400's touch screen, you will need to identify the REM400 touch screen as a switch input, and then assign that switch's action to Home Button. This section shows you how to assign actions to switches and then enable switch access.
Assign actions to switches
| NOTE | The following instructions are illustrative only as the steps may differ slightly between different Android versions and devices. |
To identify and assign actions to switches, open the Android device's Switch Access menu by tapping on Settings | Accessibility | Switch Access.
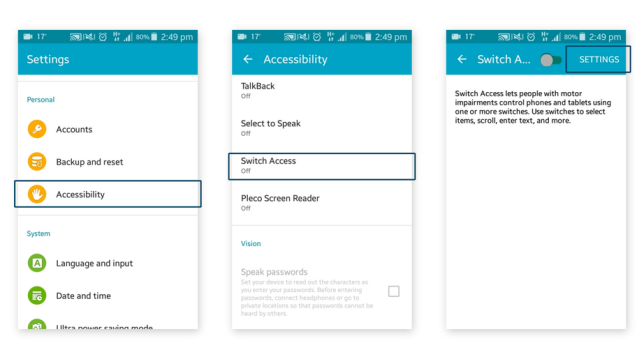
Tap on Settings (top right-hand corner).
| NOTE | If there is no Switch Access option in the accessibility menu, consider installing Android Accessibility Suite from Google Play. |
| NOTE | If this is the first time that your device has used Switch Access and you enable Switch Access before assigning switches, your Android device may automatically enter its set-up guide, which leads you through the set-up process. On certain Android devices, it has been found that the setup stalls during the Bluetooth pairing process, displaying a pop-up stating: 'Device unavailable... Couldn't connect to device...'.
If you encounter this pop-up, and cannot progress, you can either:
|
| NOTE | The following instructions are illustrative only. Switches can be assigned to many actions, the extent of which is beyond the scope of this article. |
Tap on Assign switches for scanning, or Assign switches to actions.
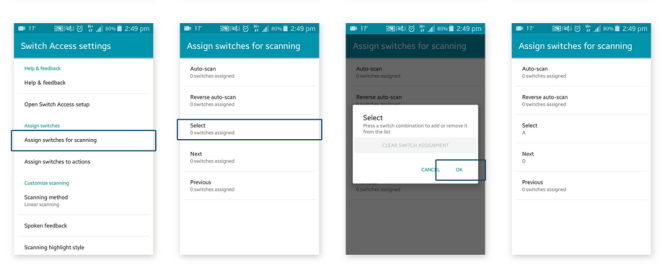
Select one of the actions in the list. For example, tap on Select. A notification displays asking you to:
Press a switch combination to add or remove it from the list.
At this point, activate the external switch (this could be a tap on the remote module's touch screen or a joystick movement in one of the four quadrant directions: forward, reverse, left and right). This assigns the switch to the selected action. Tap OK on the notification. Repeat for as many switches that need to be assigned.
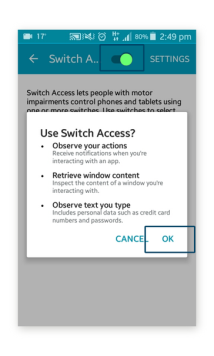
Enable switch access
After assigning switches to actions, enable Switch Access. A notification displays "Use Switch Access?" — tap on OK.
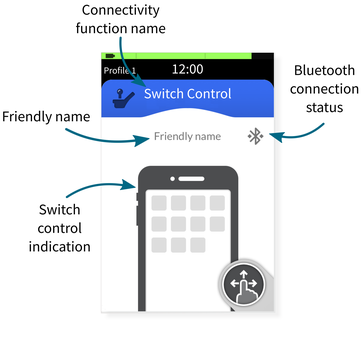
The switch control function allows the user to navigate and select items on their Android device.
The switch control indication varies depending on if a user's device is connected via Bluetooth and whether or not a switch control input is active — see below.
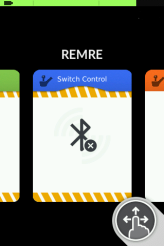
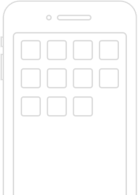
Switch control indication — not connected
This is shown when a switch control card is selected, but no user device is connected.
Switch control indication — connected
This is shown when a switch control card is selected, and a user device is connected.

Switch control indication — active
This is shown when a switch control card is selected, a user device is connected, and a switch is active.
Device navigation and operation
Use the switches that were assigned to navigate menus and operate applications on the user's Android device.
Disconnect a device
To stop using a connectivity card, select a different function card from a profile. When the connectivity card is deselected, the Bluetooth connection disconnects.
Forget a device
Open the connectivity settings menu by tapping and holding the Navigation button until the status and settings screen is displayed, and then tap on Settings | Connectivity.
Select the paired device that you wish to forget under PAIRED DEVICES.
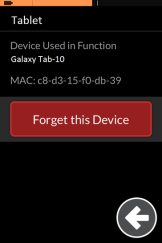
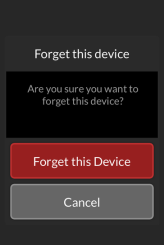
Check the details on the next screen and then tap on Forget this Device. Tap on Forget this Device button again, or the Cancel button to cancel this operation.
| NOTE | Forgetting a device will unlink it from any functions it is linked to, as well as unpair it from the system. |