How to install the LiNX Access PC tool
This article explains how to install the LiNX Access PC tool onto your PC.
Step 1 – connect to Dynamic Controls homepage (https://www.dynamiccontrols.com/).
Step 2 – click Resources Hub (top of page).
Step 3 – under Links of Interest, select LiNX PC Tool 64 bit version.
Step 4 – click the link to download the zip file.
Step 5 – once downloaded, extract the zip file to an appropriate location on your PC.
Step 6 - from the location you chose above, click on the '.msi' file to install the tool, following the on-screen instructions, as shown below.
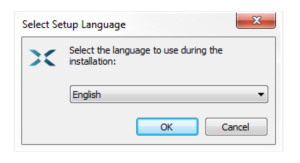
Step 6.1 — select language for installation
-
Select your choice of language from the drop-down box.
-
Click OK to continue.
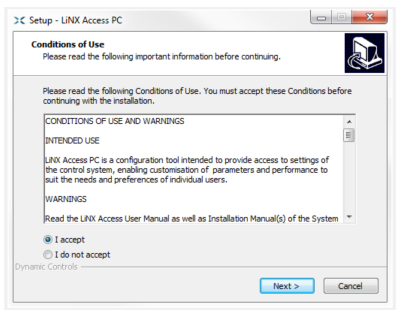
Step 6.2 — accept conditions of use
Before proceeding, read and fully understand the Conditions of Use and Warnings in this dialogue.
-
Select I accept.
-
Click Next.
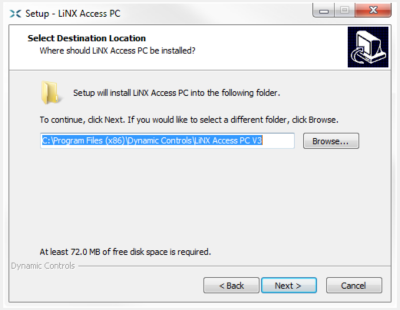
Step 6.3 — select destination folder
Save the application to the suggested folder or to an alternative folder.
To save to the suggested folder, click Next to continue.
To save to an alternative folder:
-
Click Browse and select a different folder.
-
Click Next to continue.
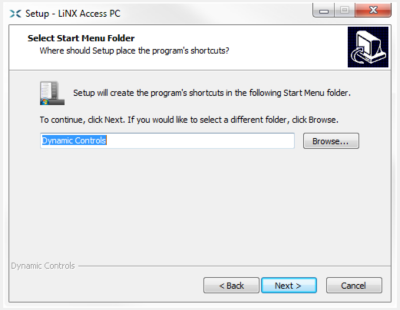
Step 6.4 — select Start Menu folder
Save the application's shortcuts to the suggested Start Menu folder or to an alternative folder.
To save to the suggested folder, click Next to continue.
To save to an alternative folder:
-
Click Browse and select a different folder.
-
Click Next to continue.
Step 6.5 — select additional icons and tasks
By default, a desktop icon is added for the LiNX Access PC tool, and the wheelchair program file (*.lci) is associated with the tool.
-
Check / uncheck the options, as required.
-
Click Install.

Step 6.6 — finish
Click Finish to complete the installation.
