Joystick shaping
|
Joystick shaping is used to calibrate a joystick to reduce the extent to which users with, for example, limited hand movement, have to deflect their joystick to reach full demand in one or more quadrants.
This application note describes how to configure the joystick shaping parameters, both manually, and using the joystick shaping calibration screen (figure 1). |

Figure 1: joystick shaping screen on LiNX Access iOS |
Introduction
For some joystick users, especially those with restricted hand movement, fully deflecting a joystick in all directions, or even partially deflecting the joystick to the same extent in all directions, may not always be possible or comfortable.
For these users, joystick shaping is used to reduce the extent the joystick has to be deflected to reach full demand in one or more quadrants.
Joystick shaping is similar to setting joystick throw, except joystick throw sets all quadrants to the same value — with joystick shaping, each quadrant is configured individually.
Joystick shaping can be accomplished by:
-
manually setting the joystick shaping parameter values (see Joystick shaping using parameters), or
-
using the calibration screen in the LiNX Access tools (see Joystick shaping using the calibration screen), where the joystick shaping parameters can be set by deflecting the joystick as well as manually updating them through a parameter interface.
Joystick shaping using parameters
There are four joystick shaping parameters that set how far the joystick needs to be deflected, in the named quadrant, to demand full speed:
-
Forward
-
Reverse
-
Left
-
Right
These can be found in the LiNX Access tools (see figure 2) under Modules | [Module Name] | User Input - Joystick Shaping.
Set each quadrant's parameter according to the user's ability and comfort.
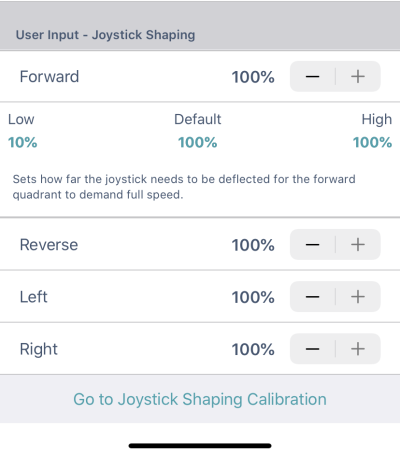
Figure 2: joystick shaping parameters (LiNX Access iOS)
.
For quadrants set at 100% (default), the user will need to deflect the joystick as far as it can mechanically go to demand full speed. For values less than 100%, the distance the joystick needs to be deflected to demand full speed is reduced proportionally. For example, if a parameter is set to 50%, the user will only need to deflect the joystick half the physical distance to demand full speed.
These parameters can also be set directly from the calibration screen’s parameter interface.
Joystick shaping using the calibration screen
Joystick shaping can also be configured from the joystick calibration screen, which is available in both LiNX Access tools.
To open in the LiNX Access iOS tool:
-
Connect the LiNX Access tool to a wheelchair through a LiNX Access Key.
-
In the connection context, navigate to the primary input parameters under:
Modules | [Module Name] | User Input - Joystick Shaping
For example, for a REM400 remote module, navigate to the parameters by selecting:
Modules | REM400 | User Input - Joystick Shaping. -
Tap on the Go to Joystick Shaping Calibration button that is located at the end of the Joystick Shaping parameters list (figure 3).

Figure 3: Go to Joystick Shaping Calibration button (LiNX Access iOS)
To open in the LiNX Access PC tool:
- Connect the LiNX Access PC tool to a wheelchair through a LiNX Access Key.
- In the connection context, click on Connection | Joystick Shaping... | [choose remote module] (Joystick shaping).
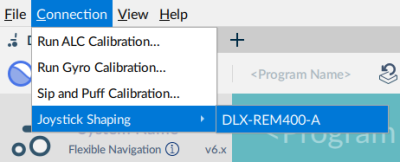
Figure 4: Go to Joystick Shaping Calibration button (LiNX Access PC)
The calibration screen opens with an instruction pop-up (see figure 5) explaining how to perform the calibration. Tap OK or deflect the joystick in any direction to continue.
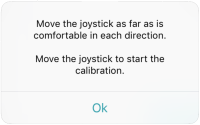
Figure 5: pop-up on opening calibration screen (LiNX Access iOS)
The calibration screen comprises the graphical interface in the upper part of the screen, and the parameter interface in the lower part (see Figure 6). Around the screen, there are three user buttons to note: Cancel, Restart and Done.
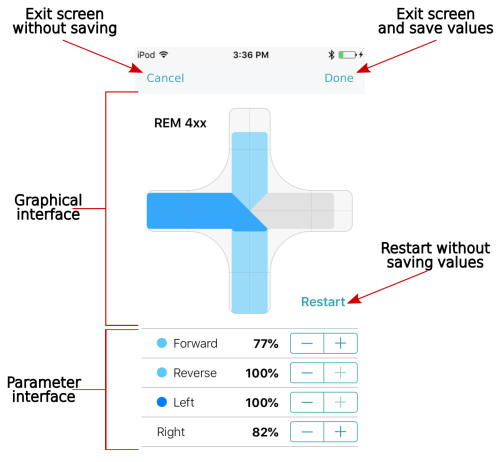
Figure 6: joystick shaping screen control overview
(LiNX Access iOS)
-
Select Cancel at any time to exit the calibration screen without saving any changes.
-
Select Restart at any time to reset the calibration screen and display the configuration’s existing values.
-
Select Done to exit the screen and save any values that have changed.
Updating values with the graphical interface
On opening the calibration screen, a four-quadrant graph is displayed with each quadrant's existing joystick shaping parameter values displayed as grey bars (Figure 7).
As a guide, the 50% and 100% points are shown in Figure 7; the exact value of each bar is displayed in the parameter interface below the graph.
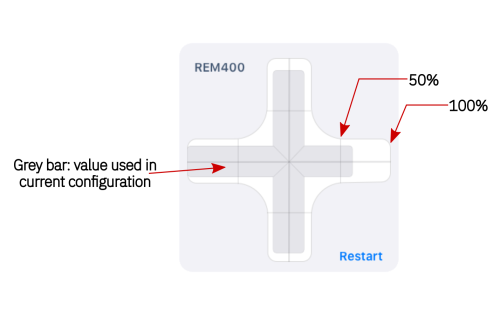
Figure 7: four-quadrant graph at start-up (LiNX Access iOS)
Ask the user to deflect the joystick in all four directions. The user can deflect the joystick in any of the quadrants, in any order, but should be deflected to a point that is comfortable and repeatable.
As the user deflects the joystick in a particular quadrant, a dark blue bar (see figure 8) displays, tracking the deflection in real time. A light blue bar indicates the maximum value reached in that quadrant, the value of which will be used if the calibration screen is exited with the Done button.
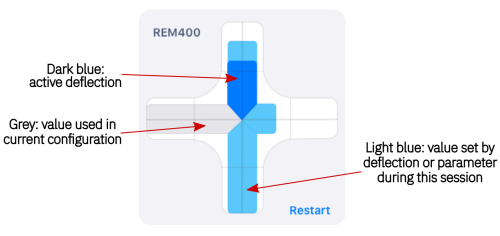
Figure 8: four-quadrant graph during calibration (LiNX Access iOS)
Once the user has completed deflecting the joystick in each quadrant and the results are acceptable, make sure that the joystick is returned to the neutral position and then select the Done button to exit the calibration screen — at this point, the calibration values, as indicated with the light blue bars (see figure 9) and also shown numerically in the parameter interface, will be saved to the configuration.
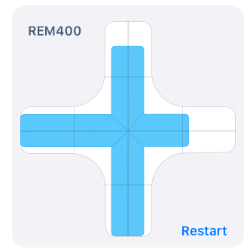
Figure 9: four-quadrant graph after calibration (LiNX Access iOS)
The Done button cannot be selected until at least one quadrant has a new value. When the Done button is selected, any quadrants with new values will be saved to the configuration.
If, for any reason, the results are not acceptable, select the Restart button to reset all the quadrants' values back to that of the existing configuration, and ask the user to attempt the calibration again.
If you need to exit the calibration screen without saving any calibration values, then select the Cancel button.
Updating values with the parameter interface
The parameter interface, in the lower part of the screen, displays the numerical view of the four quadrant parameters. Whenever the joystick is deflected, its value is updated in the parameter interface.
When the calibration starts, all parameters are grey (figure 10a).
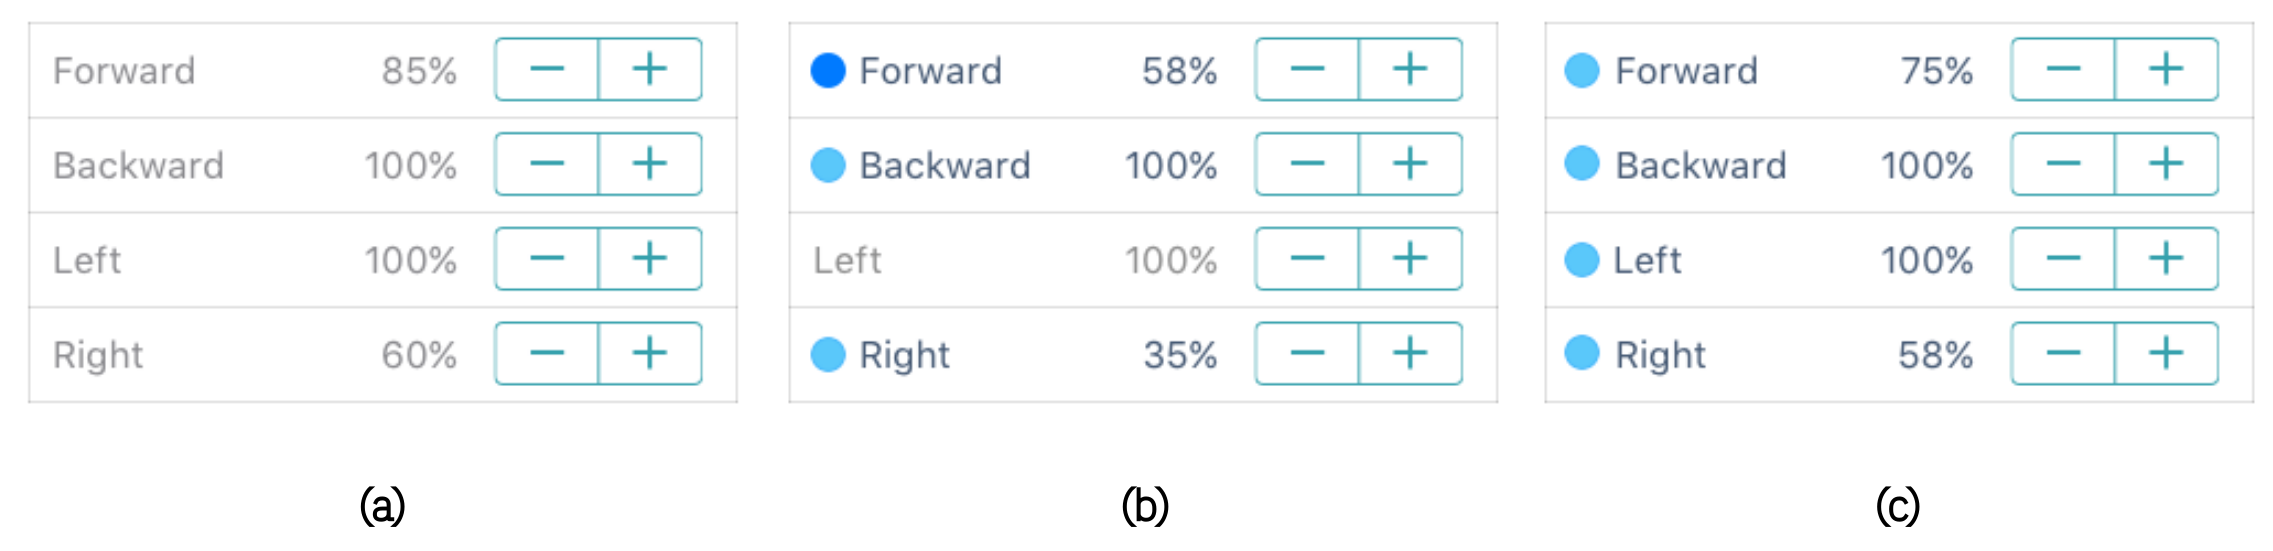
Figure 10: stages in the parameter interface (LiNX Access iOS)
During calibration (figure 10b), both the values and the dots beside the parameters are automatically updated to reflect the current value and status of the joystick deflection:
-
a grey parameter indicates no change in value,
-
a light blue dot indicates the maximum value recorded, and
-
a dark blue dot indicates an active deflection.
Whenever the joystick returns to the neutral position, the dots beside the parameter will display light blue if their value was changed during calibration (figure 10c).
The joystick shaping parameters can also be updated manually, and independently of the graphical interface, at any time when in the calibration screen, using the parameter stepper controls (figure 11) located next to each parameter — this is useful for fine tuning or recording specific values.
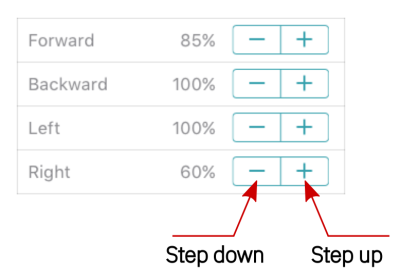
Figure 11: parameter stepper controls (LiNX Access iOS)